






TDV6 Cooling-System and Coolant-Leak Guide for Discovery 3, Discovery 4 and Range Rover Sport
TDV6 Cooling-System and Coolant-Leak Guide
A practical guide to finding coolant loss, overheating and cooling-system faults on Land Rover Discovery 3, Discovery 4 and Range Rover Sport L320 models fitted with 2.7 TDV6 and 3.0 TDV6/SDV6 engines.
Which vehicles does this guide cover?
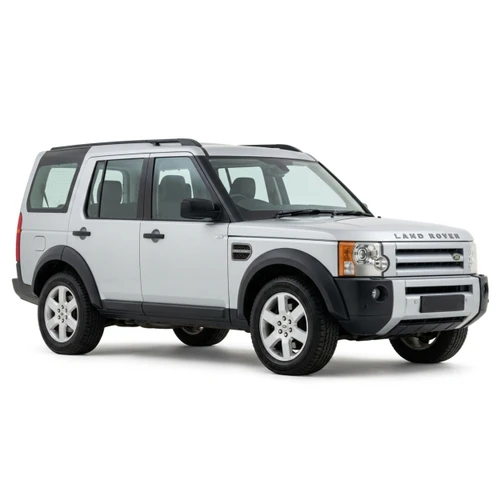
This guide concentrates on the TDV6 cooling systems fitted to the Discovery 3, Discovery 4 and first-generation Range Rover Sport. Although some individual parts may also be used on later vehicles, the hose layout, thermostat arrangement and repair procedure can differ.
| Land Rover model | Engine covered | Typical model period | Important note |
|---|---|---|---|
| Discovery 3 L319 | 2.7 TDV6 | 2004–2009 | Early and later 2.7 cooling-system arrangements and thermostat assemblies must not be assumed to be identical. |
| Discovery 4 L319 | 2.7 TDV6 and 3.0 TDV6/SDV6 | 2010–2016 | Confirm the engine size and exact vehicle details before ordering. |
| Range Rover Sport L320 | 2.7 TDV6 and 3.0 TDV6/SDV6 | 2005–2013 | The later 3.0 engine uses different thermostat and cooling-system components from the earlier 2.7. |
Symptoms of a TDV6 cooling-system problem
Coolant leaks can be obvious, but many begin as a slight seep which only occurs when the engine is hot and the system is pressurised. The coolant can then evaporate before leaving a noticeable puddle.
Coolant level dropping
The expansion-tank level repeatedly falls after being correctly filled, even though there is no large visible leak beneath the vehicle.
Coolant smell
A sweet coolant smell may be noticed around the engine bay, near the front of the vehicle or through the heater ventilation system.
Dried coolant residue
Look for pale, pink, orange or white staining around hose joints, plastic housings, the expansion tank, radiator and water pump.
Temperature warning
An overheating warning, rising temperature indication or reduced-performance message requires immediate investigation.
Cabin heater changes
A heater which becomes intermittently cold can indicate low coolant, poor circulation or air trapped in the cooling system.
Cooling fan running hard
A cooling fan operating unusually often or at high speed can accompany a temperature-control problem, although proper diagnosis is still required.
Common TDV6 coolant-leak areas
Several components can produce similar symptoms. A visible wet area does not always identify the source because coolant can run along pipes, wiring, engine castings and undertrays before dripping elsewhere.
| Area to inspect | Typical evidence | What may be wrong | Engines |
|---|---|---|---|
| Thermostat housing or water outlet | Coolant staining around the plastic housing, hose connections or centre/rear area of the engine. | Cracked or distorted plastic housing, failed seal, damaged connection or incorrectly seated pipe. | 2.7 TDV6 3.0 TDV6 |
| Thermostat assembly | External coolant leak, slow warm-up, temperature remaining unusually low or overheating. | Housing or seal leak, thermostat stuck open, thermostat not opening correctly or incorrect part fitted. | 2.7 TDV6 3.0 TDV6 |
| Expansion tank and cap area | Staining around the tank seam, filler neck, cap, level sensor or lower hose connections. | Cracked tank, leaking seam, damaged connection, level-sensor fault or pressure-control problem. | 2.7 TDV6 3.0 TDV6 |
| Water pump | Coolant around the pump area, dried deposits, bearing noise, roughness or movement at the pump. | Failed shaft seal, worn bearing, damaged pump or sealing problem. | Especially 2.7 TDV6 |
| Radiator | Damp lower corners, staining around side tanks, coolant on the lower panel or damage behind the grille. | Corroded core, damaged tube, failed plastic-to-core joint or impact damage. | 2.7 TDV6 3.0 TDV6 |
| Radiator and heater hoses | Wet hose ends, deposits beneath clips, swollen rubber, rubbing marks or splits. | Age-hardened hose, failed joint, damaged connector, loose clip or hose rubbing against another component. | 2.7 TDV6 3.0 TDV6 |
| Coolant pipe seals and O-rings | Slight seepage around a push-fit or bolted coolant-pipe connection. | Flattened, cut or hardened seal, corrosion at the sealing surface or pipe not fully engaged. | 2.7 TDV6 3.0 TDV6 |
| Heater matrix or heater circuit | Coolant smell inside the vehicle, misting windows, damp carpet or poor cabin heating. | Heater matrix leak, hose leak or connection fault. | All covered models |
| EGR cooling circuit | Unexplained coolant loss with no obvious external leak, sometimes accompanied by other engine symptoms. | Leak in an EGR cooler, associated hose, pipe or seal. | Model dependent |
| Oil cooler or engine-related leak | Coolant loss, contamination, pressurisation or leakage from a less accessible part of the engine. | Oil-cooler housing, gasket, internal engine fault or another concealed cooling-system component. | Specialist diagnosis |
A sensible coolant-leak diagnosis process
Replacing the first damp component you can see is not always successful. Clean the system, inspect it methodically and confirm the actual source before ordering parts.
Allow the engine to become completely cold
Never remove the expansion-tank cap from a hot or pressurised cooling system. Check the coolant level only when the vehicle is cold and parked level.
Record the coolant level
Correct the level only with the appropriate coolant mixture, then record or photograph the cold level. Avoid repeatedly overfilling the tank.
Remove covers and inspect properly
Remove only the covers and undertrays necessary for safe access. Use a bright lamp and inspect from above and below.
Look for the highest wet point
Follow staining upwards. The first or highest wet connection is more likely to be the source than the lowest drip.
Clean suspicious areas
Carefully clean existing coolant residue so any fresh leakage can be identified. Avoid forcing water or cleaner into electrical connectors.
Pressure-test the cooling system
A controlled cold pressure test can expose leaks which are not visible when the engine is stationary and unpressurised. Use suitable equipment and do not exceed the specified test pressure.
Check temperature data
Diagnostic live data can help determine whether the engine is warming normally, remaining too cool or approaching an unsafe temperature.
Recheck after the repair
Refill and bleed the system correctly, warm the engine, inspect for leaks and confirm the coolant level again after the vehicle has fully cooled.
Coolant loss is not the only cause of overheating
A cooling system can remain full and still fail to control engine temperature. Overheating should therefore be diagnosed as a complete system rather than treated as proof that one particular part has failed.
Thermostat fault
A thermostat which does not open correctly can restrict coolant flow to the radiator. A thermostat stuck open can instead cause slow warm-up and low running temperature.
Poor coolant circulation
A damaged water pump, obstruction, trapped air or collapsed hose can reduce circulation even when there is no major external leak.
Restricted radiator airflow
Mud, leaves, insects and debris between the front heat exchangers can reduce airflow. Cleaning must be carried out carefully to avoid damaging the fins.
Radiator restriction or damage
Internal restriction, damaged fins, a leaking core or failed end tank can reduce the radiator's ability to remove heat.
Cooling-fan problem
Fan control, fan operation or an associated electrical fault can cause overheating, particularly in traffic, at low road speed or when towing.
Internal engine fault
Persistent pressurisation, repeated coolant expulsion, contamination or coolant loss with no external source may require further engine testing.
Common TDV6 cooling-system replacement parts
The parts below cover several frequently required repairs. Always check the individual product description and confirm the engine and vehicle application before ordering.

Genuine TDV6 thermostat housing and water outlet
Genuine Land Rover thermostat housing and coolant water outlet for listed 2.7 and 3.0 V6 diesel applications.
View genuine LR073372
Aftermarket TDV6 thermostat housing
Direct-replacement version of the LR073372 housing for the applications listed on the product page.
View aftermarket LR073372
2.7 TDV6 coolant thermostat
Replacement thermostat for the specified Discovery 3, Discovery 4 and Range Rover Sport 2.7 TDV6 applications.
View 2.7 TDV6 thermostat
3.0 TDV6 and SDV6 coolant thermostat
Thermostat for the listed Discovery 4 and Range Rover Sport 3.0 TDV6/SDV6 applications.
View 3.0 TDV6 thermostat
SKF 2.7 TDV6 water pump
SKF-branded replacement coolant pump for the listed 2.7 TDV6 Discovery and Range Rover Sport applications.
View SKF water pump
Coolant expansion tank with level sensor
Replacement expansion tank for Discovery 3, Discovery 4 and Range Rover Sport L320, supplied with a coolant-level sensor.
View expansion tank
Nissens 2.7 TDV6 engine radiator
Nissens radiator for the specified automatic-transmission Discovery 3, Discovery 4 and Range Rover Sport 2.7 TDV6 applications.
View Nissens radiator
OEM thermostat-housing seal
OEM-quality seal for the LR073372-type thermostat housing on the applications listed on the product page.
View housing and seal options
Browse further cooling-system parts
Shop additional hoses, seals, pipes, radiators, thermostats and cooling-system components by vehicle model.
Browse cooling partsRefilling and bleeding the cooling system
Correct refilling is an essential part of the repair. Air trapped in the system can cause poor heater performance, incorrect coolant level, localised overheating and misleading post-repair symptoms.
- Use the correct coolant specification for the vehicle.
- Do not mix incompatible coolant types.
- Use the manufacturer's filling and bleeding procedure.
- Open only the specified bleed points.
- Set the vehicle and heater controls as required by the repair procedure.
- Check all disturbed hose and pipe connections.
- Allow the engine to warm while monitoring temperature and leaks.
- Allow the vehicle to cool fully before making the final level check.
What should be replaced during a cooling-system repair?
The correct repair depends on what has failed. Replacing every component is normally unnecessary, but reusing a damaged seal, brittle connector or contaminated coolant can cause an immediate repeat failure.
Replace disturbed seals
Use new O-rings, gaskets and seals where specified. Lubricate and fit them according to the repair instructions so they are not cut, rolled or trapped.
Inspect connected hoses
Check adjoining hoses for swelling, hardening, cracking, rubbing and damaged connectors while access is available.
Check plastic fittings carefully
Ageing plastic can crack when a hose is removed or refitted. Do not force a hose onto a damaged or distorted connection.
Use the correct coolant
Drain contaminated or incorrect coolant as necessary. Do not identify coolant suitability from colour alone.
Check belts where relevant
If coolant has contaminated an auxiliary or timing-belt area, inspect and replace affected components according to the repair instructions.
Confirm the repair under pressure
A new component does not prove that the leak has been cured. Recheck the complete system after filling and again after a full heat cycle.
TDV6 cooling-system FAQs
Can a TDV6 lose coolant without leaving a puddle?
Yes. A small leak may occur only when the system is hot and pressurised. Coolant can evaporate on a hot engine, collect in the undertray or run along another component before dripping away from the actual source.
Is the thermostat housing the same on every 2.7 and 3.0 TDV6?
No. There are different thermostat assemblies, housings and cooling-system arrangements. Confirm the engine, model, year and original part before ordering.
Does a low temperature reading always mean a faulty sensor?
No. A thermostat stuck open can prevent the engine from reaching normal temperature. Sensor readings, wiring, thermostat operation and actual coolant temperature should be assessed together.
Can I use water temporarily instead of coolant?
The cooling system should be filled with the correct coolant mixture. Plain water does not provide the required corrosion, freezing and boiling protection. In an emergency, obtain professional advice and correct the mixture as soon as possible.
Can I identify the correct coolant by its colour?
No. Coolant colour is not a reliable specification. Use the vehicle manufacturer's required specification and avoid mixing incompatible products.
Why has the heater gone cold while the engine is overheating?
Low coolant, trapped air or poor circulation can prevent hot coolant reaching the heater matrix. Stop the vehicle safely and investigate rather than continuing to drive.
Should I replace the water pump when replacing a thermostat?
Not automatically. Replace the component which has failed and inspect related parts while access is available. A leaking, noisy, rough or loose water pump should be replaced.
Why does the coolant level change after a repair?
Trapped air can move through the system during the first heat cycles, changing the cold level. Recheck the level only when fully cold. Continued loss still requires investigation.
Can an expansion-tank cap cause coolant loss?
A damaged or incorrect cap can affect cooling-system pressure control, but do not assume the cap is the only fault. Inspect the tank, filler neck, hoses and the complete system.
Is a pressure test guaranteed to find every leak?
No. Some faults occur only when components are hot, moving or exposed to exhaust pressure. A cold pressure test is extremely useful but may need to be combined with hot inspection, UV dye, diagnostic data or further specialist testing.
Find cooling-system parts for your Land Rover
Browse thermostats, water pumps, expansion tanks, radiators, hoses, seals and other cooling-system components at JGS4x4.